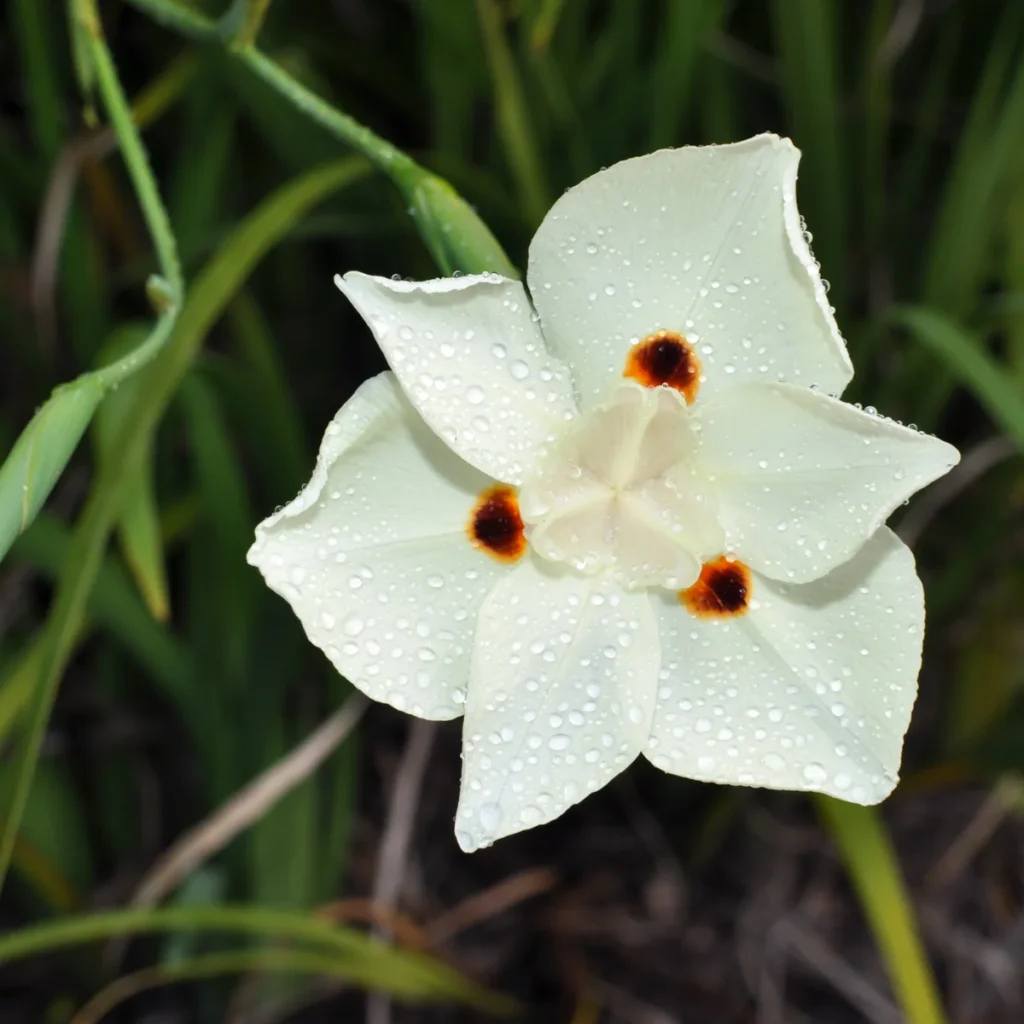
Dietes bicolor, commonly called yellow wild iris or bicolor iris, combines narrow leaves with pale flowers marked with brown. It forms clumps that work well in borders or containers. Before choosing a position, consider the room its foliage will need and the available light: a small nursery plant does not show the full volume of a mature clump.
Plant profile
Scientific name: Dietes bicolor.
Common names: yellow wild iris, bicolor iris; known as moreia-amarela in Brazil.
Family: Iridaceae.
Origin: South Africa.
Habit: a clump-forming herbaceous perennial with rhizomes.
Size: around 60 cm to 1 m tall, depending on growing conditions.
Leaves: green, narrow and elongated, like small swords.
Flowers: pale yellow with brown markings; individual flowers are short-lived.
Light: full sun or partial shade.
Soil: well drained, with moisture available but no stagnant water.
Propagation: seed or rhizome division.
Sunlight, space and choosing a position
Yellow wild iris tolerates partial shade but generally grows better in sun. Some shade can help in very hot inland gardens. Allow room for sideways growth: a mature clump can approach 1 m wide. Position it where the leaves will not force you to trim the plant just to keep a path clear.
The species tolerates dry conditions and poor soil, but responds to compost and regular water. Being resilient does not mean a newly planted division can be forgotten without watering.
Planting and repotting
For an established nursery plant, prepare the new spot before removing it from its container. There is no need to divide it merely to plant it. Loosen the soil and incorporate well-rotted compost. In a pot, use a suitable growing mix and check the drainage holes. Arrange the roots without forcing them to bend and keep the plant’s base at its previous level, without burying the leaves.
Plant and water to settle the soil, then monitor moisture while the plant recovers. If a clump fills the whole container, dividing it lets you renew the planting without moving to ever-larger pots.
Watering and tidying the foliage
Once established, the plant may need little water, but demand depends on the location. Remove leaves that spoil its appearance rather than shearing the top of the clump like a hedge. Work leaf by leaf, taking care not to cut surrounding new shoots.
Check the soil before increasing watering. Water standing in a saucer, an already wet potting mix and a dry surface are different situations. Inspection prevents you from responding to every damaged leaf with more water.
When to divide and what happens afterwards
Rhizomes can be divided after flowering. Choose a pause in flowering in your own garden rather than following months recommended for another country. The Royal Horticultural Society warns that divisions may be slow to establish: do not expect immediate flowering or discard a plant simply because it has not yet bloomed.
The plant does not need formative pruning. If space is the problem, reconsider its position or the size of the clump. Repeatedly cutting back the foliage does not remove the rhizome that continues to grow.
How to propagate by division
1. Choose a healthy clump. Prepare a spade or garden fork, a cutting tool and the new containers or planting spots. Choose a mild or overcast day. If the soil is dry, moisten it before starting.
2. Lift carefully. Loosen the surrounding soil and lift the clump, preserving the roots. Remove only enough loose soil to see how the fans of leaves connect.
3. Separate complete sections. Each should retain shoots, roots and part of the rhizome, the underground stem. Use a tool where gentle hand separation is not possible. A handful of loose leaves is not a complete new plant.
4. Protect and replant. Keep the divisions shaded and protected from drying until planting. Set them at their previous depth, water to settle the soil and monitor moisture during recovery. Do not leave exposed roots in the sun while preparing the rest of the bed.
Faded flowers, few blooms or dry leaves?
A flower faded quickly: individual flowers are short-lived, and new buds may follow on the same plant. Watch the sequence rather than judging a single flower.
No flowers: record how much sun actually reaches the bed and whether the plant was recently moved. Compare new shoots and buds over time before changing several aspects of care at once.
Dry or yellow leaves: check whether only a few leaves are affected or the problem is spreading through the clump. Photograph the base and foliage and note the soil conditions. Colour alone does not identify a pest, deficiency or disease. Seek local advice if deterioration continues. The guide to yellow leaves explains how to organise these observations.
Sources
South African National Biodiversity Institute (SANBI); Singapore National Parks Board (NParks); RHS: dividing perennials; University of Minnesota: division; RHS: Dietes bicolor; City of Austin. General propagation advice is presented without assuming that a temperate-climate calendar applies everywhere.
Photograph: © Citron / Wikimedia Commons, CC BY-SA 3.0. Square framing preserved, resized where necessary and compressed to a 1200 × 1200 px WebP without enlargement. Derivative shared under CC BY-SA 3.0.